
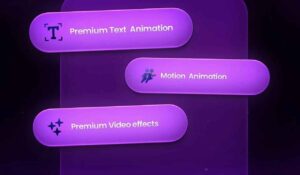
You’ve got plenty of Premiere effects, animations, and text in Capcut, but people have overused them so much that they’ve lost their value. And anyway, many of them aren’t even worth using. So this time, you ‘ll learn about advanced Capcut pro features you probably don’t know about yet. So, that’s why, welcome to the Editing Master Advanced Capcut tutorial, in which I’m going to cover premium text animations, motion animations, and premium video effects and transitions. I’m going to cover all five. They ‘ll help you a lot with editing, and Capcut, you got it [sound of clearing throat], join it. It’s in the description. And yes, I’m going to use Proton’s VPN.
Capcut advance editing discussion about 2026
So,after turning it on, come to Capcut pro apps. So, let’s first move on to video effects. And I’ve found five Capcut effects that will be very useful for you. So, first, go to Effects and then Video Effects . And here, search for Haze. And then apply this first one. What does this effect do? It focuses in the center and blurs the sides, creating depth in the video. You can see the difference. And if I go to the effect’s adjustments, I can control the blur here. How much less will it be, how much more. You can also set the positioning of this blur using these two values: horizontal and vertical. And that was our first effect. Now come on to the next effect, our TV Lines. Adding this video effect gives your video a cinematic storytelling feel. But if you go to its adjustments and halve all the values, it will give even your flat video a professional look because it has added texture and twist. Now come on to the next effect, our Wide Angle, which looks something like this after applying it. This widens the angle of your video.

It ‘s a little difficult to explain. It’s a bit cinematic. You’ll understand, you’re smart. Now, let’s move on to the next effect, which is our one and only Glow 2. I know some people might know about this video effect, but for those who don’t, it’s Glow 2, of course. I’ll explain what it does later. First, click on it, go to Objects, and set it to All Video. Now, it does a very simple job. It creates a glow based on your layer. And believe it or not, it creates the best glow. And you can also control its glow and size as you like. Now, come on to the next effect, which converts your layer to 3D. For that, you need to search for Player 3 and add this effect, and set its glow speed and texture to zero. And now, you can create a 3D look by using the Rotate value here. But first, go to Objects and set it to All Video. Now, you can add animation to your layer using keyframes. Then, go to the effect’s adjustments and set the keyframes for the rotate value accordingly.
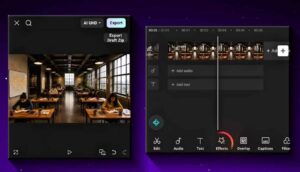
You can rotate it to your liking. This will create a somewhat 3D look. But there’s a problem. The fade-in effect is starting at the beginning, and black bars are appearing on the sides. To solve this problem, I’ll add a layer and place it at the beginning. And set the effect’s length accordingly. Now, export it to a new project and upload it there. Now, since the layer and effect have been combined here, we can delete the starting layer. And our fade-in effect is gone. Now, if you adjust the positioning using keyframes , you can remove the black bars here, like this. It also works on PAG, so you can create similar things. So now let’s move on to transitions. I’ve picked out five premium transitions that I also use. To access the transitions, click in the center of the two layers and your transition tab will open. Here, search for the glare tool. And apply this first one. And you can also set the duration of the transition as per your requirement. And you can add some sound effects to this transition. If you want sound effects, get them from my Twitter or Discord. They’re in the description. Now, the next transition is our subtle shake. Meaning, it works as a shake between two layers. But this shake is not noticeable. That’s why it’s great. The next transition is our slide down, this one. And this one like I find transitions unique. And I’ve used them many times in similar situations .
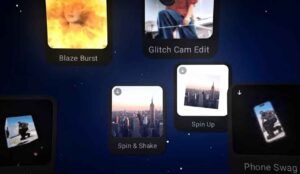
Now, let’s move on to the next transition, our Delay Zoom. This is basically a zoom transition, but it’s much smoother. You can see it. And the last transition is our Space Flip. This is basically used when we shift the entire scene. So , let’s move on to the animations. Our first animation is this clock transition, which you may have seen in my videos before, but it’s made in the Elite version. And I’m teaching you how to make this in Capcut. So, I have two images here. I want to create a clock animation from these images. So, there’s nothing much to do. Go to its mask and select the circle mask so that the clock fits inside it. If you need to make fine-tuning adjustments, go to Adjust and position it properly. Now, our clock has emerged from this image. So, let’s animate it. But first, let’s increase its length. Let ‘s keep it at four seconds. So, I’ll go to the end of the timeline and add a keyframe. Then, I’ll move back a little, like two seconds. And I ‘ll increase the size of the clock and place it in the middle. And our keyframe will be automatically added. To smooth out the animation, I’ll add a graph to it using this option. Here, I ‘ll select Quad E. Okay. Now, the scene looks something like this. So, now we’ll duplicate it and place it on top of it. And now, we’ll go to the mask section of the duplicated layer and click Invert . Now, if you bring the play head down to one second, you can see that the clock and room are separated. Leave this clock at the bottom. And here, we’ll add a graph. It’s out. Now, we’ll make the same changes on the second layer, but we’ll enlarge its size and move it out of the frame. There’s a graph called Cubic Out there. Add that. Now, you can see your smooth animation is ready. Whether you add a glow or a vignetting is up to you, but don’t forget to set its objects to all. You can also export it and add motion blur to it in a new project. I set it to 50, and it’ll look dashed. Now, let’s move on. Next is our folder animation. To create it, you’ll first need to add a folder here. Yes, I know you’re wondering where to get these assets? Well, creating one on the CPU isn’t possible.
So, I’ll provide all the assets used in this video in the description . Also, if you want to create these assets yourself, I’ll explain later. So, there’s a folder here with two layers: back and front. So, the animation looks something like this : it will emerge from the paper from within. So, I’ll add a piece of paper inside it, making it smaller. And now, add two keyframes. And then, move the play hand to the starting keyframe. And then, place this paper inside the folder. And rotate it slightly. And adjust it to your liking and add a graph to it so it’s smooth. I’ll select Cubic Out. That’s fine, but it’s above the folder. So, go to the Layers section of this layer. And then, place this paper behind the front folder. Send to back. In simple terms, by pressing this button . And if you want, you can add two more pieces of paper here. And here, our animation is done. Now, you can do any animation, like glow, zoom in, zoom out, etc., as per your convenience. You already know how to do it, right? So, next comes animation, which is our timeline animation, which looks great in videos and documentaries . And also, it’s very easy to create. Well, for this, you ‘ll need Pixel Lab, because Capcut hasn’t added shapes to the mobile version yet. So, I’ll create a design like this using shapes and gradient colors in Pixel Lab . I’ll add text to it as per my preference, and export it to PNG format. If you’re a little lazy, don’t worry. You ‘ll find the PLP file in the description. This means Pixel Lab’s project file. So, I’m already in Capcut. And here, I ‘ll upload the Pixel Lab PAG file. I’ll enlarge it and move it down. You’ll see the Splice option. Click on it and select the Hard filter, as this filter fits the scene. Now, I ‘ll place a keyframe at the starting and 2 seconds of this layer. And where I placed the second keyframe, I ‘ll rotate it. You can also do this with the Element Transform option.
Capcut pro editing tutorial
I did it like this. Obviously, I’ll add a graph for smoothness. Now, I’ve imported another background image so that when the layer switches , the image switches as well. Place the starting point of this image between two keyframes. Go to its layers and place it below this page. Then, go to the layer’s animation section and apply the ink reveal animation. Now, your animation is complete. You can apply any glow or vignetting you want. So, next is your character animation. I’m demonstrating it with a character. You can do whatever you want, like shape, morph objects, etc., like switching , etc. So, first, I’ll add two keyframes to this character. Then, I’ll come to the second keyframe. And I’ll move this character slightly to the side. Then, go to its graph section and select the cube. Then, go to its adjustments. And at this point, add a beat and do something like this. I’ll keep the length of this layer to the second keyframe. Now, add the character to which you want to switch. Keep its position and size the same as the last character. Now, add two keyframes to it. Move the second keyframe a little more to the left . Choose Graph Ease Out. Go to its adjustments and add a beat and adjust it like this. Now, our character shifting cap cut is ready. Now you can apply sport blur or motion blur to it as you wish. So, come on to the last animation, which is our steps animation. For this, I created a stick with white keyframes, also in red. So, I ‘ll mask the red one and select the horizontal one. Rotate it to 90° . Then, add two keyframes, one starting at 2 seconds. And I’ll make the second keyframe full so the entire red appears. Then I’ll go to the starting keyframe and swipe it left to make it disappear. Then I’ll add a graph to it . And it should look like this.
Now I’ll also import a rounded rectangle and fit it over the keyframe. Now, to give it a pop-up animation, I’ll add keyframes. So I’ve added two keyframes to it. I’ll go to the first keyframe and shrink it down. Then I’ll add a graph to it called Rebound Out. And go to its layers and place it at the back. Now, here’s our pop-up animation. Now, let’s duplicate it and apply it to all three. After duplicating, set its keyframes again. And keep the timing in mind. It should pop up as soon as the red point touches the keyframe. Now, once this is done, we’ll add text to it. Simply create text, change the font, and add a shadow. After adding text in all three places, our animation is complete. Now you can add a glow. And then export it and create similar slide animations in a new project. That’s all done. Now, let’s get back to the text. So, first of all, some text designs will be created in Pixel Lab, because you already know what Capt is like. So, how will they be created in Pixel Lab? If I start explaining the details of Pixel Lab now, the video will become too long. So, let me show you the simplest way to generate text in Pixel Lab. First, add text. Use any font. I’m using this one. And for the color, you can use a gradient. Keep it dark at the bottom, light at the top. You can customize it as you like . And finally, add bevels or inner shadows. Then export your text as a page and return to Capcut. So, your text has been added here . So, we’ll add two keyframes here, and then slide it down to the starting keyframe . Then, add a graph, cubic out, and adjust it like I did in its adjustments. Then, go to its animations and add a fade-in animation. Do the same thing with the other text. Finally, add the glow-in effect, which will enhance your text. Next is our Apple-style text animation. This is my favorite. For this, you’ll need to type the text in CapCut. Select “Popin Cellphone.” Now, if you go to the text animations, search for “Bounce Left” and apply this effect. Add your glow-in, and your Apple-style text animation is ready. Next is our error text. I created this text with the Pixel app, so let’s add it here. If you need text styles, please. If you need the Pixel app file, I’ll provide it in the description. So, you’ll have to create these.
We’ll add the same animations we added in the clean style. But we’ll add another effect, Blur, and reduce its value a bit. Now, you’ll also find a red stick. Add it, mask it , and select Horizontal. First, keep it fully visible and in a slanted position, and assign a keyframe. Now, move the play head back, raise it, and make it disappear. Then, apply Glue To. And our error text is ready. And that’s it. We’re finished with the text here . But these were three, right? The other two had the same animation, but their designs were different. So, I’ll put them in the description. You can try them yourself . So, in this video, you’ve seen five premium video effects and transitions , five cool animations that will be useful to you, and five text animations. So that’s the Capcut Advanced tutorial. If you haven’t seen the rest of EditingSt, here’s the playlist. I’ll see you there.






Nice post
Please
Hwjjejkekjnsbbsn jenbebnannbwb3bbr hh Ghosh. U1 tough
Lobv
Cap cut pro link download
Suraj Kumar
Ygfhyfgyf
August month new capcut pro send
Capcutpro me Guys please Support me know what you want to do it again soon please Support me
Calcutta pro
Capcut chahiye mujhe
Aur purv wala