
Today I will show you how to capcut pro for pc download 2026 and how to use all the pro features in capcut pro for pc version completely for free. It is very easy because we will use Capcut pro own application, okay? We will not download any other program or use any other tool; we will only use capcut pro for pc version, and you can download the application from the official website. I have Capcut pro for pc download 2026, this is the latest version; in fact, it is a beta version. You can update to it or use the previous version. With this method, you can use artificial intelligence features, image generator, video translation and all this. Okay? So, it is important that you stay in the article until the end because I will show you the process step by step. I will keep it as short as possible. So, without further ado, let’s start this article, okay, first you need to open capcut pro for pc version.
Capcut pro for pc
If you want to download Capcut pro pc version without any problem, then press on the download button

After that, you need to log in with a Gmail account or any account you have, okay? It doesn’t matter if you are not a Pro account; You can see here that it says to join Pro, and if I click on it, it will ask me to select a plan. So, you can log in. After you log in, you have to click on this icon. When we click on this icon, we will select Settings. Next, we will go to this folder where it says “Save”. You are going to click on this icon, grab it and click here and press Ctrl+C, or if you have a Mac, press Ctrl+C to copy, okay? You are going to copy this address. So, we are going to copy it. Next, we will go to our Windows folder. I have the Downloads folder here. We will click here and paste the address that we copied. After that, we will press Enter. When we press Enter, it will take us through all these folders. Let’s leave it like this. Okay, we will not do anything here now. Later I will explain what these folders are for. After that, we will go back to the Capcut pro for pc application and click Cancel. Cancel again. And then we will click Create Project.

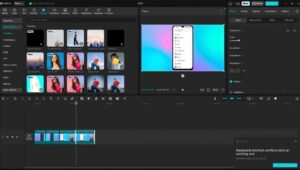
When we create a new project, we’re going to import our videos. I’m going to import a 16-second long one so you can see how fast it is. Okay, so I’ll put the videos in here. I’m going to add some pro effects. First let’s add some audio, put one here that I always use, this, this is a pro effect. Let’s put it here. Let’s turn the volume down. I’ll put it here so you can see. Done, I’ve added the audio. Look, this is a pro effect. Now I’m going to add some pro stickers. Let’s add this subscribe sticker. You know, subscribe to my channel. Let’s put it here. Done. Let’s add another sticker. I put this here. I like this. Let’s put it here. Okay, next, let’s add an effect. Let’s add a part of the effect. Let’s add this here at the end, to see what effect I can add. No, let’s make it a pro effect. Let’s add this TV off effect. Let’s put it like this so that it’s the last thing. Okay. What else can I add? A transition. Uh-huh. I’m going to add this sidebar here. Wolf. Done. What else? Uh, subtitles. Let’s add some subtitles. So, since I’m going to add subtitles, I’m going to remove this “Subscribe” button. I’ll put it here, because we’re going to put the subtitles where they were, uh, click here for subtitles. I’m going to select that it automatically detects the language and adds, uh, how do you say it?, an English dub, an English subtitle as well. Let’s see where the English is here. Here. Done. I’m going to click generate here. Next, we’re going to add some templates. We’re going to add a font. Actually, we’re going to add a professional one. Let’s see here. This is a professional one by Bebas. Let’s put it here. Oh, no, yeah, it’s pro. Look, here, this is here. So, let’s add a pro font to the English font here. Let’s add this color to see. Yeah, let’s make it a little bigger. Um, a template in English font too
Capcut pro for pc version
Let’s add it. Let’s find a good one. Here it is. And let’s add a good font. Let’s add the same “Bebas” font to see. Here is “Bebas”. So, select the whole font and that’s it. Now, after we add all the functions, there are many more things you can add, but so that the video doesn’t get too long, I’m just going to show you these. I want to show you that you can also export in the quality and size of your choice. Now, Eldrin, how does this work? Next, I just click on export and that’s it, because look, I clicked on export and it shows me the option to subscribe to a plan. In this case, since I’m not going to subscribe to a plan, I’m going to click on “Return to Edit”.
And after that, we’re going to do the following. Look, we’re going to click on Aspect Ratio, we’re going to click on Custom, and here you’ll see that it’s showing up as a field to give it a name. We’re going to leave it as it is. We can see that the video will be saved in this folder. I’ll show you how we can save the video in that folder. And here we can select the size. We can select if we want it, for example, in Instagram format, short, whatever you want. Now, for this, you’re going to click on the aspect ratio here. You can select, for example, for YouTube, for Instagram, or whatever you want to customize. You’re going to click here where it says resolution, you’re going to click on custom, and here you’re going to write the size at which you want to save the video in this folder. Okay. About the FPS, it’s going to be left at 30. Even if you select 60 fps, it’s going to be saved at 30, right? That’s the only limitation of this method. So, after selecting the size, you have to click on save. Next, we have to select the entire project. How do we do this? Look, you can do it with your mouse, like this, or what you can do, something easier, is press Ctrl+A. When you press Ctrl+A, it will select the entire project. There, you are going to click, and then click here where it says “Create Combined Clip”. Okay. After doing that, you need to play the entire video. So, let’s play it. Yes, today you are going to learn how to use all the pro features in Capcut pro for pc download 2026, so don’t forget to like this video and subscribe to Eldrin Lobo’s channel. And if you want to learn how to create realistic videos with artificial intelligence, turn on notifications because Eldrin will teach you how to do it. Okay? So, if you haven’t subscribed to my channel, subscribe. If you want to learn how to create videos using artificial intelligence, take this opportunity and subscribe because I will be uploading videos about it. So, after playing your video, we will proceed to the step of saving it in the folder that appears under “Custom”. Remember? Okay, we will right-click here and click where it says “Preprocess Combined Clip”. When you click, you’ll see “Applying a Function” at the top and you’ll see the percentage of the video being saved in the Drafts folder, the folder that says “Custom.” Right? When it shows 100%, that means the video has been saved. Next, to see where the video is saved, we need to click on “Custom” here. We click on “Custom” and here we see the folder where our video is, the folder that we opened at the beginning. So, we’re going to go to the folder that we opened at the beginning. I’ll put it in small print here. And we need to find the folder that’s showing up here. Mine is showing this, with 01 02 in brackets, 1. Yours will show up with a different number, with a different name. So it’s important to check which folder is in here. So, I’m going to look for the video. Here’s the 01 02 folder. This is it. Let’s click on it. When you’re in the folder, you’re going to look for the resources folder.
Next, you’ll look for the “Combination” folder. And here you’ll see two videos, one blank and one of yours. If I click on it, you’ll see that it’s showing with an error. So, to make sure it doesn’t show with an error, we need to do the following. Look, I’m going to close this. Grab our folder. Let’s go back to Capcut pro for pc. Click “Cancel”. Let’s go back to the folder, and here I’m going to drag the video. So, when I drag the video, you’ll see, look, it’s placed here, and it’s complete, it has subtitles. Now I can put it here. You can hide your video if you want, hide the audio, hide everything, and leave the one that we dragged. Let’s play it to see if it actually saves. Yes, today you’re going to learn how to use all the pro features of capcut pro for pc download, so don’t forget to like this video and subscribe to Eldrin Lobo’s channel. And if you want to learn how to create realistic videos using artificial intelligence, turn on notifications because Eldrin will teach you how. So, you can see that it works perfectly, and now I can export it in the quality that I want. If I click on export here, you can see that I can give it a different name. I can name it “Video One”, and I can select the folder that I want to save it in. I’m going to select the download folder. I can select the resolution that I want, for example, 4K or 2K. I can select the FPS, but since I already had 30 FPS, there’s no point in selecting a different FPS, right? It’ll stay at 30. After that, we can click on export. Look, he’s exporting our video. If I were to do this with the original video, it would require a pro user. And look, today you’re going to learn to use all the features. Look, even without being a pro user, he’s already saving my video. Yes, today you’re going to learn to use all the functions. So, you can do the same thing by making videos with AI, images, all of these. Although all the AI functions – well, they mostly work with credits, it’s like, if you’re a pro, you get unlimited access, no, they have credits. So, you have to look at the AI related to it, because it depends on your credits. Now let’s find the video in the downloads folder and see if it’s saved. I’m going to download it here. I’m going to play my video. Look, it’s here. Yes, today you’re going to learn to use all the pro functions of Capcut pro for pc, so don’t forget to like this video and subscribe to Eldrin Lobo’s channel. And if you want to learn how to make realistic videos using AI, turn on notifications because Eldrin will teach you that. Look, it’s saved and played, so it’s going to work for you. Now, if you want to edit something after watching the video, you don’t have to create a new project and do it all over again, right? Look, you go back to Capcut pro for pc version, and if necessary you can hide the video that you used, or you can delete it if you don’t like the result, okay? You make the video that you saved and pre-processed visible, okay? And then you select it and click on “Undo Combined Clip”. When you click there, you can edit your project again. You can edit the entire project and follow the same procedure. Okay, you see, this method works, and if you do it the way I showed you in the video, it will work for you too.


Pardip77
If you want to download this app absolutely free and easily, then this website kbd24.com
Rashid Hussain vs Haeeb Usman
joinalkhan
Mnnnhuif
Let’s add it. Let’s find a good one. Here it is. And let’s add a good font. Let’s add the same “Bebas” font to see. Here is “Bebas”. So, select the whole font and that’s it. Now, after we add all the functions, there are many more things you can add, but so that the video doesn’t get too long, I’m just going to show you these. I want to show you that you can also export in the quality and size of your choice. Now, Eldrin, how does this work? Next, I just click on export and that’s it, because look, I clicked on export and it shows me the option to subscribe to a plan. In this case, since I’m not going to subscribe to a plan, I’m going to click on “Return to Edit
Cap cat Pro and edit video 📸 for the same as the time of a great weekend to be outside to
7cgmhjjfjjfjkgjtjsndhgfffgbffkggdfgbvv. Rhzg.
i’ts fake
teri maa ka bhosda madharchod, apni maa ko randi banake unki bhi ad laga de, jab nahi pata tujhe kuchh to kyu karta hai maa bhosda randi ke beech , teri behen ko chody , teri maa ka bhosda chut maarike , teri maa me baas daalu
ek number ahahahahah
BHEN chod wo tujy kariidd le
Capcut pro version download apk 2026
Capcut 20.6.0
Kong
Bjjj
OM prakash
Jitendra Kumar.
Sagjdhfkcg
Badullaganj jia badaun
Sanju sayar
Hi
capcut
Habits
Pro
Dkhkdksks
Bcyu bh
shivshiv Mali
Khana
CapCut For PC the perfect choice for creators who want premium editing tools without paying high subscription fees, making video projects smooth, fast, and professional.
CapCut PC helps beginners unlock advanced features easily, giving access to premium effects, transitions, and filters that improve video quality and boost creative editing results. >> https://capcutproapkap.com/
Instagram
capcutpro.me
https://capcutpro.me
Capcut pro for pc download 2026
Me karan nishad hun mera Capcut Pro daunlod nahi ho raha hai
Dahanu rod Antriget nava pada
Hy to yuiyvgfcghhctghudgtxofvcnoyoxeascxdhzv hii ufhdcurg
फ्लिपकार्ट डाउनलोड करें ऐप डाउनलोड करें अप का डाउनलोड करें
same “Bebas” font to see. Here is “Bebas”. So, select the whole font and that’s it. Now, after we add all the functions, there are many more things you can add, but so that the video doesn’t get too long, I’m just going to show you these. I want to show you that you can also export in the quality and
Capcut pro
উইউউজ্বন্বেনেন্ডন্দ্বৱডবডবডবদ্বীন্দ্বব্দন্ডবদ্বীব্দবেজদ্যদ্যদ্যযদিন